Immunotherapy Allergy Shots: My Process, Cost, and Outcome

Most people would look at the photo above and think it’s beautiful. I agree, but mostly I just think about the watery eyes and the sneezing I would do if I was in that field. I’ve struggled with allergies and hay fever my whole life. My son has the same allergies.
Allergy medicine works for me for a little while, but after some use, it no longer decreases symptoms so I have to find something new. I decided it was time to do something a little more long term: Allergy Shots, also known as immunotherapy.
The idea behind allergy shots is that after a series of increasingly potent injections, your immune system can be desensitized from triggers that cause allergic reactions. It takes many months, and even years, but it can offer some real, long-term relief from Allergies.
Recently, my son and I began the process. As usual, I’ve taken detailed notes so I can refer back to them and remember how the process happened.
When I had my PRK Surgery and Recovery fifteen years ago, I wrote a post about the process. There have been over one million views of that post. It turns out, people like to see real hand experience of medical procedures so they know what to expect and plan for in their own process.
In that light, I thought I’d share some allergy shot highlights here for those considering such a thing. Since this is a long process, I’ll update this post over the next few years so share the long term results. Be sure to subscribe to email updates if you’d like to see additions to the post.
Keep in mind: I am not a medical professional. These are simply my observations:
Starting the process
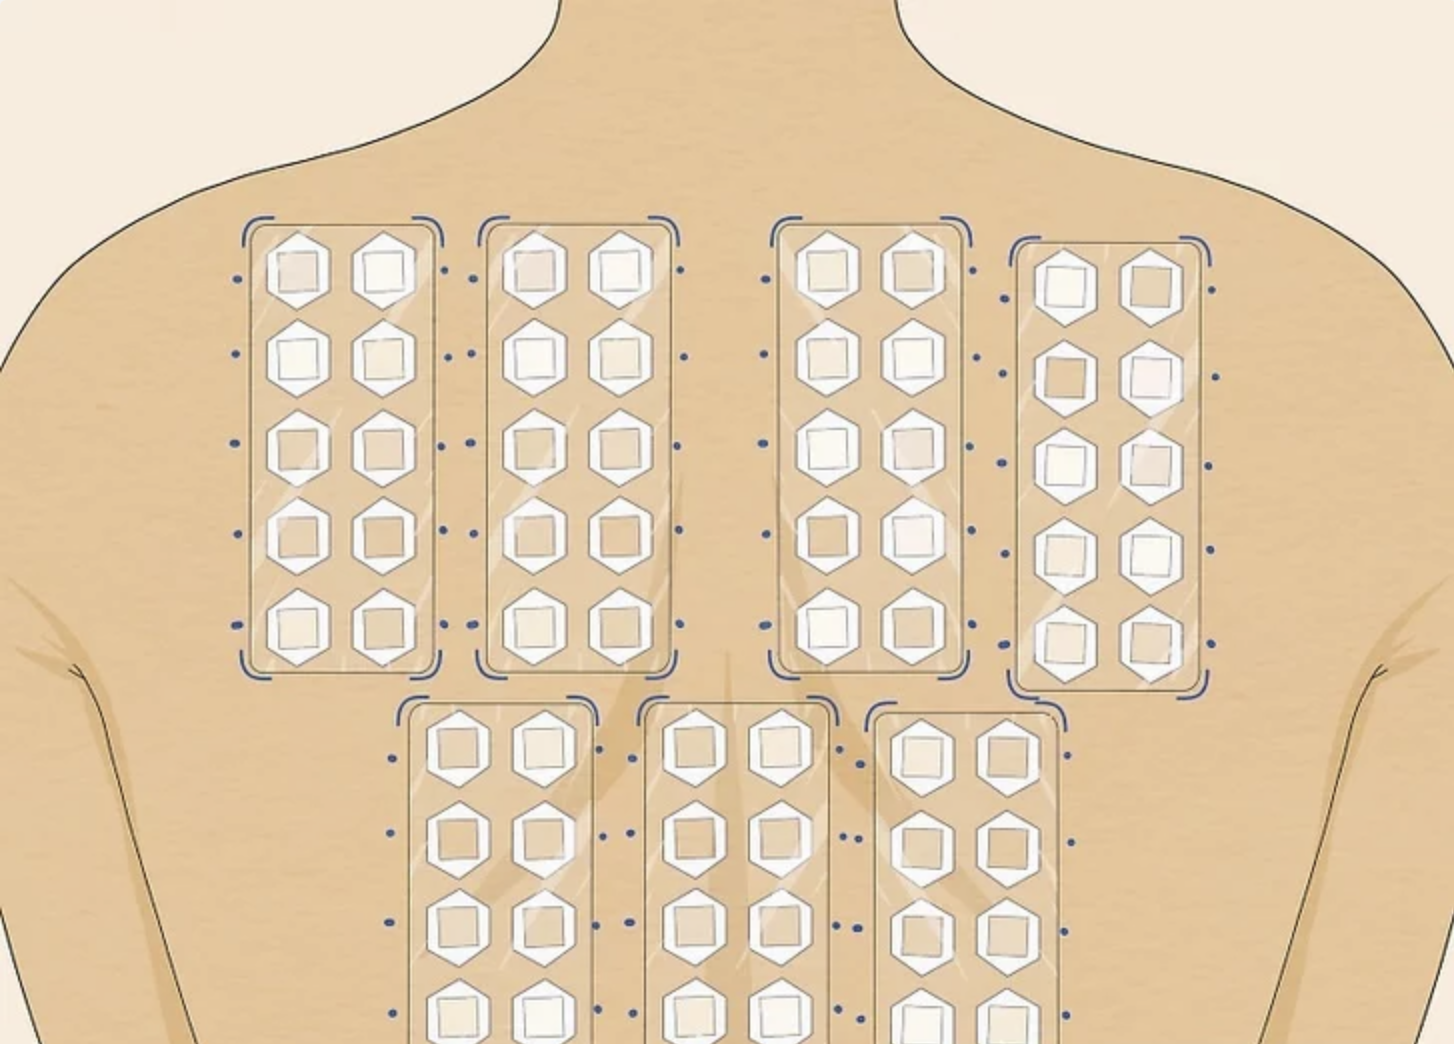
The first step is to meet with the allergist. They will give you an allergy skin test. The usual process is that they draw a graph on your back and needle prick you in each box, and apply a little bit of the irritant to see how your body reacts. Here is a drawing that I found online:

I’ll spare you a photo of how my back reacted. It wasn’t pretty. You know those little button candies that you eat off the paper? Imagine that, but all red buttons. My allergies included all sorts of weeds, grasses, pollen, and other things you find on a golf course. (One of my favorite places to be.)
There was also a reaction for dogs, cats, and horses.
For the short term, the doctor prescribed Dymista and OTC zyrtec to control symptoms. He also confirmed that allergy shots would do well for us so we decided to move forward.
Costs for the treatment
Costs can be so difficult to relay since insurance will apply different ways for different people. Many insurance plans will cover part of the treatment, while you may still have co-pays other other fees. For us, it has been about $2800 out of pocket for each of us This includes the cost to see the doctor and have the test ($800), the mixing of the serums ($1200), and a small co-pay for each shot. ($18)
The number of shots depends on how your body reacts so we just pre-paid a good amount.
Getting the Shots
We opted to get shots for all of the plant allergens and also the cat and dog. I don’t spend much time around horses so we decided to skip that one.
The staff at the allergy office will mix a serum specifically to your treatment. There will be one for plants and one for animals. This means you get one shot in each arm every time, and they rotate back and forth. (For us, the plants have been much more reactive so it’s nice to give each arm a break.)
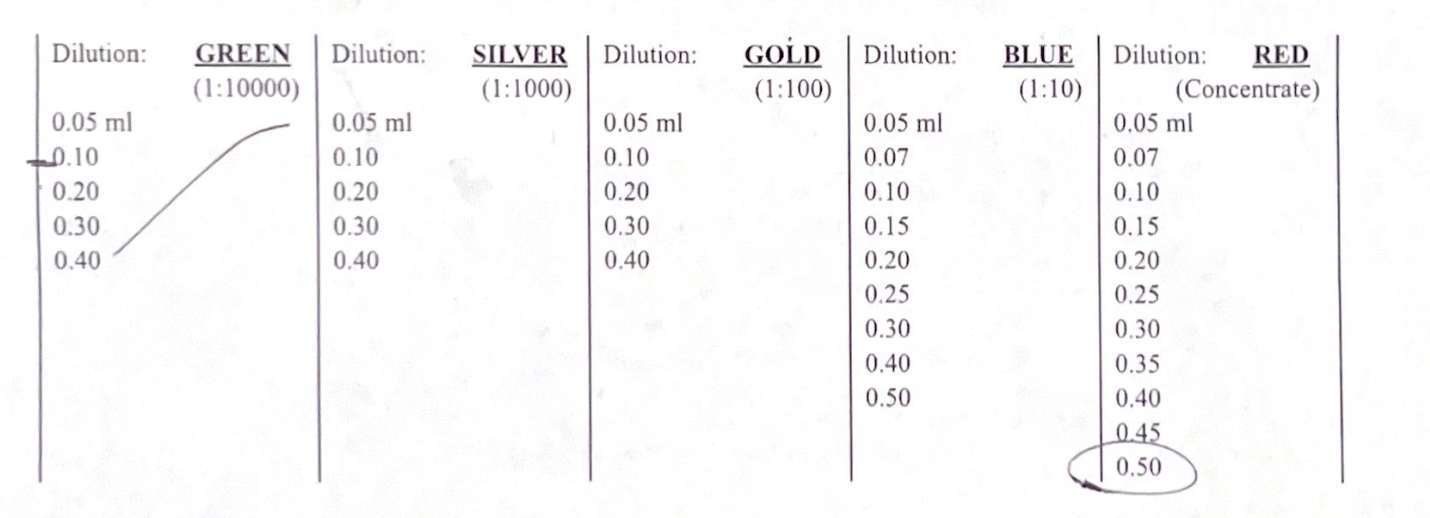
The serums are then separated into five different color bottles, each one more potent.

Each time you go in for a shot, they use a different bottle and dilution level. The first one one pretty much just water and then over time it’s more and more potent.
For the first four bottles, you just need to have 48 hours between shots. We decided to get through that process as quick as we (and the insurance company) would allow so we went three times a week.
The office makes it easy to come in for shots. No appointments are required. They just give you a schedule and you can come in anytime during those windows. Most of the time it’s not too busy.
For each shot, you need to take an antihistamine one hour before and also bring an epipen. (Which they will help you purchase.)
After the shot, you need to sit at the office for about twenty minutes. They’ll then ask to see your arms to be sure the reaction is not too severe, and then you’re able to go. (Apparently, most bad reactions happen in those first twenty minutes, though our staff said they’ve never actually had to use an epipen on anyone in their time there.)
Some notes on shots:
- The first four shots are barely noticeable.
- The fifth shot was the first one from the Silver bottle and it burned a bit. Or as our needle lady likes to say, “It gets spicy.”
- On the sixth shot, I had a bruise on my arm. I was told it was normal and the needle probably just hit something.
- Shots 8, 9, and 10 were getting more swollen each time. They were also itching. They decided that from that point on, they would “epicoat” my needle. This helped quite a bit.
- Shot 12 had such large swelling that I had to repeat it. Luckily, Will was out of town that day so he didn’t get a shot ahead of me and we stayed on track with each other. When the arms swell, your triceps are massive. It doesn’t look terrible…
- Shot 15 was blue bottle, you could feel that one pretty good. Spicy.
- Shot 24 was red bottle, which was really starting to have some presence. Up until this shot, we were coming three times a week. With red, you can only take one a week so the process slows down a bit.
- Shot 29 was pretty hot in both arms. We walked around looking like gorillas for the first ten minutes in the office. It starts to calm down after that, but the arm does stay pretty hot and swollen for the day. Usually, I’ll spend the evening with an ice pack on which helps.
- Update: At the one year mark, we’ve been moved to once every couple weeks. We also have changed to taking Zyrtec only before the shots and not every day.
- Continued in a future update…
You have a bit of a forgiveness window with these red shots. You can take them as often as a week, or as far as two weeks. If you’re outside of that window, you’ll need to repeat the last shot again. (They give you a paper that explains all of this so you can figure out a schedule for yourself.
Now that we are thirty shots in, we’re getting close to the maintenance level. This is the last shot that they’ll step up to and you’ll take it as needed over time. It may start weekly, then monthly, then every few months, etc.
The Outcome
We are five months into the process and almost into the maintenance stage. I can already tell a difference in my reactions.
After shot 29, I asked the doctor if I could stop taking the allergy medicines (except for the single antihistamine one hour before the shot.) He said that would be fine.
I was happy to see that my body is already improving on how it reacts to allergens. It used to be that I was sneezing and stuffy by the third hole of a golf round. (Still worth it.) Now I only feel minor reactions.
Also, my breathing at night has become much better, which helps me sleep better.
All that being said, we’re still in the buildup phase and it’s not expected that real change should be in place. This is a process that can take a while.
I’ll plan to update this post every six months with the current situation.
Is it worth it?
The hardest thing about this process is getting started. It’s hard to commit to something that you know will take at least a year, and probably a few. But it’s alright to commit. Once you get started, it becomes pretty routine.
I’ve struggled with allergies my whole life and it’s not fun. If this was going to be a long term fix, it’s worth it. It’s certainly worth it for my son who still has a lot of life adventures ahead.
The cost is not small, but if it replaces buying allergy medicines for the rest of my life, maybe everything evens out.
If you have any questions, you can reach me from my About page. I’ll add any FAQ to the bottom of this post if I think it would be helpful for others.


